Blog
Why Is Your Refrigerator Not Cooling?
Oceanside Appliance Repairs explains why your refrigerator may not be cooling and what you can do to troubleshoot the problem before calling a technician in Oceanside, CA. 
Homeowners in Oceanside often face cooling issues with refrigerators during hot months, especially when airflow is blocked, coils are dirty, or components fail. Our technicians diagnose and repair refrigerator cooling problems in Oceanside, Vista, Carlsbad, and surrounding North County San Diego communities.
Written by a certified appliance repair technician with over 10 years of experience servicing refrigerators across Oceanside and nearby neighborhoods.
If your refrigerator isn’t keeping your food cold, don’t panic yet.
This guide shares eight DIY steps that may restore cooling performance and save you a service call.
- Check the power supply
- Verify the thermostat settings
- Inspect the door gaskets
- Ensure vents are clear
- Clean condenser coils
- Check the condenser fan
- Replace faulty motors
- Test the evaporator fan
1. Verify the Refrigerator Has Power
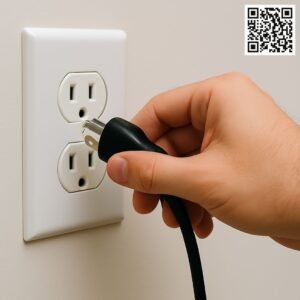
The refrigerator requires a functioning power source to operate. Sometimes a loose plug or tripped circuit causes the unit to stop cooling. Open the door and check for the interior light; if the light is off, inspect the power cord and outlet.
Action: Unplug and replug the appliance securely.
Tip: Plug another device into the same outlet to confirm it’s working.
2. Inspect the Thermostat Settings
The thermostat controls the internal temperature of your refrigerator. If the setting is too high or was accidentally bumped, the fridge may not cool properly. Most thermostats are located in the upper section of the fridge or in the control panel.
Recommended temp: 37°F for the fridge, 0°F for the freezer.
Action: Reset and monitor the temperature for several hours.
3. Check the Door Gaskets for Damage
Door gaskets create an airtight seal that keeps cold air inside. If the gasket is torn or worn, warm air can enter, preventing proper cooling. This issue commonly affects older GE, Frigidaire, and Whirlpool models in Oceanside homes.
Test: Close the door on a dollar bill. If it slides out easily, replace the gasket.
Action: Order the OEM gasket and install it or contact us for replacement.
Pro Tip: Use a dollar bill to test your door gasket. If it slides out easily when the door is closed, your seal is likely compromised.
4. Ensure Air Vents Are Not Blocked
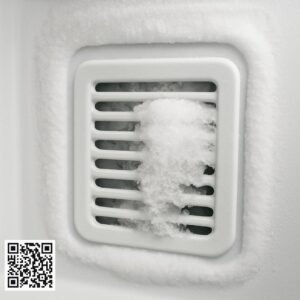
Cold air moves between the freezer and fridge compartments through internal vents. Blocked vents—often caused by overcrowding or frost buildup—lead to uneven temperatures. This is a frequent issue in top freezer refrigerators in Oceanside kitchens.
Fix: Unblock the vents by rearranging food items.
Action: Defrost manually if frost buildup is visible.
5. Clean the Condenser Coils
Condenser coils release heat as refrigerant flows through them. Dusty or clogged coils prevent heat from escaping, reducing the efficiency of the cooling system. Coils are typically located underneath or behind the refrigerator.
Action: Unplug the unit, remove the toe grille, and clean with a coil brush or vacuum.
Frequency: Clean every 6 months, especially in coastal homes with pets.
6. Examine the Condenser Fan
The condenser fan cools the compressor and coils during operation. If the fan blades are blocked by debris or not spinning, the refrigerator may overheat. Side-by-side models from Samsung and LG often use rear cabinet-mounted fans.
Action: Clean dust and debris from the fan blades.
Test: Spin the blades manually to ensure free movement.
7. Replace the Condenser Fan Motor If Needed
The condenser fan motor powers the fan blades. If the motor fails, cooling performance will drop and the compressor may overheat. Oceanside Appliance Repairs stocks replacement motors for most major brands.
Action: Unmount the faulty motor and install a new one using the existing bracket.
8. Check the Evaporator Fan Inside the Freezer
The evaporator fan pulls air over the cooling coils and circulates it throughout the refrigerator. If it stops working, the fridge won’t stay cold. This is especially common in French door models with rear-mounted fans.
Action: Empty the freezer, remove the back panel, and test or replace the fan.
When to Call a Refrigerator Repair Technician in Oceanside
If you’ve completed the steps above and your refrigerator still isn’t cooling, the issue may involve the sealed system or compressor. In such cases, professional repair is essential. Our certified technicians in Oceanside provide accurate diagnostics and same-day repair for Samsung, GE, Whirlpool, LG, KitchenAid, and other leading brands.
Tip: If the cost of repair is more than 50% of a new unit, replacement may be the better choice.
Bonus: Check our recommendations for the best refrigerators to buy in 2025.
Helpful Read: Want to prevent refrigerator issues in the future? Check out our guide on Yearly Refrigerator Maintenance Tips.
Related Appliance Blog Posts
Oceanside Appliance Repairs proudly serves homeowners throughout Oceanside, Carlsbad, Vista, San Marcos, Encinitas, and the entire North County San Diego region. For same-day service or expert troubleshooting, contact our team at (760) 496-5437.


